This post has been a long time coming...
Last year our school had an art exhibition, where each child needed to produce an artwork to show. My class of seven year olds was eternally optimistic and wanted to produce FOUR smaller artworks, in a mixed media study of owls. We didn't quite make it to four, but gave it a good shot.
Our first project was to produce a salt dough owl. Each child got a handful of dough (I think I used about 3kg of flour in total) and we followed the tutorial here
 Be warned- it took two days to bake 21 A5 sized dough owls enough. And baking salt dough smells kinda funny.
Once baked, we looked at the process of painting our owls. We under-coated them with white, and slowly layered our paint. I wanted to emphasise the importance of getting the maximum effect- waiting to dry between each layer meant that we didn't end up with a horrible mess of brown paint.
Be warned- it took two days to bake 21 A5 sized dough owls enough. And baking salt dough smells kinda funny.
Once baked, we looked at the process of painting our owls. We under-coated them with white, and slowly layered our paint. I wanted to emphasise the importance of getting the maximum effect- waiting to dry between each layer meant that we didn't end up with a horrible mess of brown paint.
 This process took a long time. In the end, to get it done I would have a painting table set up each morning and afternoon with a bucket of brushes and buckets of water. The children would arrive at school (or come back from lunch) to add their next layer before continuing with their tasks.
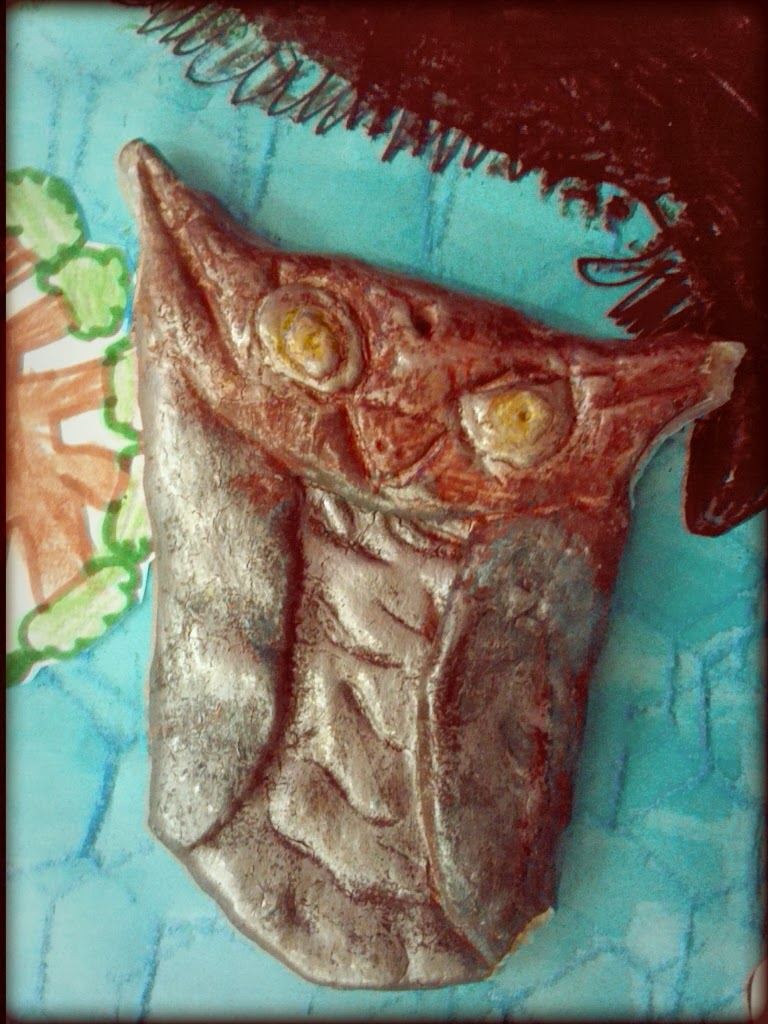
 Once happy with the finished effect, the children dry brushed the owls with their choice of gold or silver paint. We did this in small groups, as limiting the paint on your brush is a foreign concept to many seven year olds.
 I finished the owls with a coat of clear spray varnish. I then cut a piece of felt to fit the back of the owl, cut a small slit in it and glued the felt onto the reverse side of the owl. This meant the slit in the felt would slide over the thumbtack and allow the owls to hang on the wall for exhibition day.
 Because the dough owls were a long and drawn out process, we began them first. Then, as we waited for dough to cook and paint to dry we looked at several 'how to draw cartoon owl' tutorials online. Our sketch books are chock full of owls. Many children found it hard to follow the instructions at first, and resilience and the need for careful listening were discussed by the children. One real sticking point was there was a ban on erasers... we need to learn to love and learn from our mistakes. The book "Ish" by Peter Reynolds was much loved and the children really took the story to heart.
 Once we found some tutorials we liked, the children were given a nice sheet of thick artist paper (A4) to do their cartoons. Some chose to fill the page with lots of little owls and some chose to do just one owl in the middle. I was astonished with how gorgeous the results were. The pages were finished with a coat of hairspray to stop them smudging... and the children seemed to think that extra care made their artwork extra special.
 By now the exhibition deadline was just 24 hours away, with only two artworks completed. We agreed in a class discussion to finish the remaining two in class for our own satisfaction rather than rush through an artwork for display. I do love them so.


Comments
Post a Comment